


Step-by-Step Guide to Using an Edge Finder in CNC Machining
Learn how to use an edge finder in CNC machining with a step-by-step guide. Improve setup accuracy with mechanical and electronic edge-finding tools.
Complete Guide to Edge Finder Usage for CNC Machinists
To produce high-quality parts on a CNC machine, the machine must be configured appropriately. Even if a CNC program is well written and uses the latest available technology, if the workpiece is not referenced correctly, the result will be low quality (dimensional defects, wasted material, and wasted production time). Edge detection is an effective method for locating reference points on the workpiece.
An edge finder allows a machinist to accurately and easily locate all workpiece edges. This information enables the machinist to set the zero point on the workpiece before production starts. This guide explains the process for finding all the edges of a workpiece and will be helpful to anyone involved in CNC machining or manufacturing.
Why Edge Detection Is Important in CNC Machining
Before cutting begins, the CNC machine must know the workpiece's exact position relative to its coordinate system. Even a small error during setup can cause:
-
Incorrect dimensions
-
Misaligned holes or slots
-
Poor surface finish
-
Tool breakage
Using a precise referencing method ensures consistent results across single parts and full production runs.
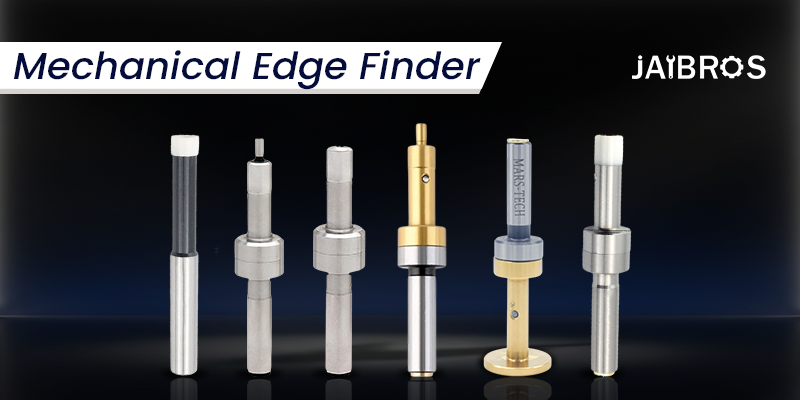
Step 1: Understand the Type of Edge Detection Tool
Before you start using an edge finder, it is important to understand what type of edge finder you will use.
Edge finders with mechanical edges use contact/visual methods. When the edge finder contacts the surface/edge/corner of a component, the probe tip deflects to indicate the position of that surface/edge/corner.
Edge finders with electronic edges use electrical contacts or sensors to determine edge position and provide rapid, accurate feedback. Therefore, they are generally much faster and provide more precise indications and as a result can be used for applications that require high precision.
When deciding which type of edge finder to use, consider the required precision, the type of machine, and operator preferences.
Step 2: Prepare the Machine and Workpiece
Cleanliness and preparation are essential for accurate setup.
-
Ensure the spindle taper is clean
-
Secure the workpiece firmly using proper clamping
-
Remove chips, oil, or debris from the workpiece surface
-
Confirm that the machine is homed correctly
These steps reduce the risk of false readings and improve overall accuracy.
Step 3: Mount the Edge Detection Tool Correctly
Use the edge finder tool as you would a standard cutting tool, inserting it into the spindle or collet. It must be inserted fully into both the spindle or collet and locked into position with an appropriate torque. Do not over-tighten the edge finder; this can damage sensitive components, particularly in electronic versions. A properly mounted edge finder will rotate smoothly and reliably detect edges.
Step 4: Set the Correct Spindle Speed
Spindle speed plays a key role in accurate detection.
For mechanical tools, a moderate spindle speed is usually recommended. Too high a speed can cause vibration, while too low may make visual detection difficult.
Electronic versions often work at lower speeds or even without rotation, depending on the design. Always follow manufacturer guidelines for best results.
Step 5: Locate the Workpiece Edge
Slowly move the machine axis toward the workpiece surface.
When using a mechanical tool, observe the tip closely. As it touches the edge, the tip will deflect or “kick,” indicating contact. At this moment, note the machine position.
When using an electronic tool, the signal may be delivered as light, sound, or a machine input, confirming edge contact.
At this stage, the edge finder provides a precise reference for zeroing.
Step 6: Set the Machine Zero or Offset
Once the edge is detected, adjust the machine coordinates to set the correct zero or work offset. This step ensures that the CNC program starts cutting from the intended location.
Repeat the process for the opposite side or different axes if required. Using an edge finder allows machinists to perform this task with confidence and repeatability.
Step 7: Verify the Reference Point
Before starting machining operations, it is good practice to verify the setup.
-
Recheck the edge location
-
Perform a dry run if possible
-
Confirm that tool paths align with the workpiece
Verification minimises the risk of errors during actual cutting.
Typical Applications in CNC Machining
Edge detection is used in various CNC operations, including:
-
Milling and slotting
-
Drilling and boring
-
Facing and contouring
-
Prototype and short-run production
In all these applications, an edge finder supports faster setup and consistent accuracy.
Benefits of Using Edge Detection Tools
Using proper edge detection methods offers several advantages:
-
Reduced setup time
-
Improved dimensional accuracy
-
Better repeatability
-
Lower scrap and rework rates
These benefits make edge detection an essential part of efficient CNC machining workflows.
Mechanical vs Electronic Tools: Which Is Better?
Both mechanical and electronic options have their place in CNC machining.
Mechanical tools are simple, affordable, and reliable for general-purpose machining. Electronic tools offer faster detection and higher sensitivity, making them ideal for precision-critical environments.
Regardless of type, a well-maintained edge finder remains a dependable solution for accurate setup.
Tips for Best Results
To achieve consistent performance:
-
Inspect tools regularly for wear
-
Avoid excessive spindle speeds
-
Use gentle approach movements
-
Store tools properly when not in use
Following these practices ensures long-term accuracy and reliability.
Role in Improving Productivity
Faster setups lead to more machine uptime and higher productivity. Over time, accurate referencing reduces errors, tool damage, and inspection failures.
A dependable edge finder contributes directly to smoother workflows and better machining outcomes, especially in job shops and production environments.
Conclusion
Accurate setup is a critical factor in CNC machining success. By following a structured approach to edge detection, machinists can achieve faster setup times, improved accuracy, and consistent results. A properly used edge finder remains one of the most practical and cost-effective tools for precise CNC referencing.
About Jaibros:
Jaibros is a trusted provider of high-quality CNC cutting and measuring solutions. With a focus on precision, durability, and performance, Jaibros supports manufacturers in achieving reliable and efficient machining operations.
FAQs
1. What is the main purpose of an edge detection tool in CNC machining?
It is used to accurately locate workpiece edges for correct zero setting and machine referencing.
2. Can beginners use mechanical edge detection tools easily?
Yes, they are simple to operate and ideal for learning CNC setup basics.
3. Are electronic tools more accurate than mechanical ones?
Electronic tools generally offer higher sensitivity and faster detection, especially for precision work.
4. Do edge detection tools work on all materials?
They work on most materials, though electronic versions may require conductive surfaces.
5. How often should edge detection tools be inspected?
Regular inspection is recommended to maintain accuracy and consistent performance.
Κατηγορίες
Διαβάζω περισσότερα
The global supply chain landscape is currently witnessing a massive transformation as the demand for temperature-sensitive products surges across multiple sectors. A comprehensive Temperature Controlled Packaging Market Analysis reveals that this industry is no longer a niche service but a fundamental pillar of global trade. From life-saving pharmaceuticals...

Polaris Market Research has published a brand-new report titled E-Commerce Automotive Aftermarket Size, Share, Trends, & Industry Analysis Report: By Replacement Parts, By End Use (B2B and B2C), and By Region – Market Forecast, 2025–2034 that includes extensive information and analysis of the industry dynamics. The opportunities and challenges in the report's dynamical...
In a world where first impressions can make or break opportunities, your printed materials must scream professionalism, clarity, and impact. That’s exactly why cheap a4 printing services singapore are becoming the secret weapon for businesses that refuse to settle for mediocrity. Whether you’re launching a startup, running a corporate office, or organizing an event, high-quality...

-Contributed by Navaneeth R. Heart disease is something we generally equate with old people with numerous comorbidities. But globally, about 1.3–1.5 million babies are born with congenital heart defects (CHD) every year. This estimate comes from the widely accepted prevalence of approximately 8–12 cases per 1,000 live births worldwide and the current annual global birth rate....
The United States Food Storage Bags Market is witnessing substantial growth as consumers increasingly seek convenient, hygienic, and sustainable food storage solutions. According to The Insight Partners, the Global Food Storage Bags Market size is expected to reach US$ 21.45 Billion by 2034 from US$ 9.43 Billion in 2025. The market is estimated to record a CAGR of...