


How to Use a Feeler Gauge for Accurate Gap Measurement
Learn how to use a feeler gauge correctly to measure gaps accurately. Step-by-step guide covering feeler gauge range, least count, and usage tips.
Correct Way to Use a Feeler Gauge for Precise Gap Checking
Precision gap measurement is a critical task in automotive servicing, mechanical maintenance, and industrial assembly. Small variations in clearance can affect performance, efficiency, and component life. That is why learning the correct method of using a Feeler Gauge is essential for technicians, engineers, and workshop professionals who rely on accurate results every day.
Understanding Gap Measurement and Its Importance
Gap measurement refers to checking the distance or clearance between two mating surfaces. These clearances are designed intentionally to allow smooth movement, thermal expansion, or lubrication flow. Incorrect gaps can lead to vibration, overheating, excessive wear, or complete mechanical failure.
A Feeler Gauge is specifically designed to measure such small gaps that cannot be checked using standard measuring tools. It uses thin blades of precise thickness to determine whether a gap is within acceptable tolerance.
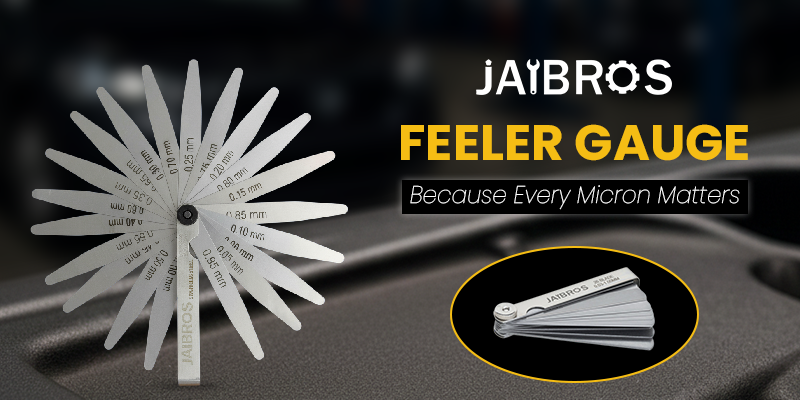
Components of a Feeler Gauge Set
Before learning how to use the tool correctly, it is important to understand what a typical feeler gauge set contains. The set usually includes multiple thin metal blades joined at one end. Each blade is marked with its thickness, commonly in millimeters or inches.
High-quality sets use hardened or stainless steel blades for durability. Some sets also include angled or tapered blades for hard-to-reach areas, especially useful in automotive engines and compact machinery.
Step-by-Step Guide to Using a Feeler Gauge Correctly
Step 1: Clean the Measuring Area
Ensure the surfaces where the measurement will be taken are clean and free from oil, dirt, or debris. Even a thin layer of contamination can affect accuracy. Wipe both surfaces before inserting the blade.
Step 2: Select the Correct Blade
Choose a blade that is close to the expected clearance. The correct blade should slide into the gap with slight resistance. This “light drag” feel indicates a proper fit and accurate reading when using a Feeler Gauge.
Step 3: Insert the Blade Gently
Insert the blade straight into the gap without forcing it. Applying pressure can bend the blade or give a false reading. The blade should move smoothly but not loosely.
Step 4: Adjust If Necessary
If the blade fits too loosely, try a thicker blade. If it does not fit at all, move to a thinner one. In some cases, combining multiple blades helps achieve the exact clearance value.
Step 5: Read and Record the Measurement
Once the correct blade thickness is identified, read the marking on the blade. This value represents the measured gap. Using a Feeler Gauge correctly ensures consistency and repeatability in such readings.
Understanding Feeler Gauge Range and Least Count
Two important technical specifications influence measurement accuracy.
The feeler gauge range refers to the minimum and maximum thickness values available in the set. A wider range allows the tool to be used across different applications, from fine automotive adjustments to industrial machinery alignment.
The feeler gauge least count in mm indicates the smallest thickness increment available. A smaller least count allows for more precise measurements, which is crucial in high-precision engineering tasks.
Common Applications in Automotive and Industrial Work
In automotive maintenance, the tool is widely used for valve clearance checks, spark plug gap measurement, and brake component inspection. These tasks require accuracy to ensure smooth engine performance and safety.
In industrial environments, a Feeler Gauge is used to verify machine alignment, check bearing clearance, and inspect assembly tolerances. Proper use helps reduce machine wear and improves operational efficiency.
Common Mistakes to Avoid
One common mistake is forcing the blade into the gap. This can damage the blade and lead to incorrect readings. Another issue is using worn or bent blades, which compromises accuracy.
Ignoring blade cleanliness is also a frequent error. Always clean the blades after use and store them properly. Using a damaged Feeler Gauge can lead to repeated measurement errors and poor mechanical performance.
Feeler Gauge Price and Value Considerations
The feeler gauge price varies depending on material quality, number of blades, and brand reputation. While low-cost sets may be suitable for occasional use, professionals should invest in durable, corrosion-resistant sets.
A higher-quality Feeler Gauge offers clearer markings, consistent blade thickness, and longer service life. This makes it a cost-effective choice in the long run for workshops and factories.
Maintenance Tips for Long-Term Accuracy
After each use, wipe the blades clean and lightly oil them if recommended by the manufacturer. Store the set in a protective case to prevent bending or corrosion.
Periodic inspection of blade edges ensures that worn blades are replaced promptly. Proper care ensures your Feeler Gauge continues to deliver accurate measurements over time.
Conclusion
Learning how to use a Feeler Gauge correctly is essential for accurate gap measurement in automotive and industrial applications. From selecting the right blade to understanding range and least count, each step contributes to reliable results. When used and maintained properly, this simple yet powerful tool plays a major role in ensuring mechanical precision and long-term performance.
About Jaibros
Jaibros is a trusted supplier of precision measuring tools and industrial equipment, offering reliable solutions designed to meet professional engineering standards. With a focus on quality and accuracy, Jaibros supports automotive and industrial users with tools built for dependable performance.
FAQs
1. What is the main purpose of a feeler gauge?
It is used to measure small gaps or clearances between two components accurately.
2. Can multiple blades be used together?
Yes, combining blades helps achieve an exact measurement when a single blade is not sufficient.
3. Why is least count important in measurement?
The least count determines the smallest measurable gap, directly affecting accuracy.
4. How often should blades be replaced?
Blades should be replaced when they show signs of bending, wear, or faded markings.
5. Is one set suitable for both automotive and industrial use?
A high-quality set with a wide range can be used effectively in both applications.
Categorii
Citeste mai mult
According to the latest report published by Data Bridge Market Research, the Mycotoxin Binders Market CAGR Value The Global Mycotoxin Binders Market size was valued at USD 1.54 Billion in 2024 and is expected to reach USD 3.32 Billion by 2032, at a CAGR of 8.9% during the forecast period A comprehensive Mycotoxin Binders Market research...
In the modern commercial landscape, accolades are often viewed as the final destination—a glittering finish line after a year of hard work. However, a paradigm shift is taking place. The Business Excellence Awards are no longer just about recognition; they have evolved into a strategic framework for continuous improvement, stakeholder trust, and global credibility. Unlike vanity...

Microsoft courses are among the most in-demand professional training programs worldwide, helping individuals and businesses build strong digital skills in productivity, cloud computing, data, and IT infrastructure. Whether you are looking for Microsoft certification courses, Microsoft online courses, or a complete course on Microsoft Office, these programs are designed to improve career...

Drug addiction is a serious and life-altering condition that impacts not only individuals but also their families and communities. Finding the right rehabilitation centre is a crucial step toward recovery, as effective treatment requires a combination of medical expertise, psychological support, and compassionate care. Humana Wellness Centre has earned a reputation as one of the best drug...

According to the latest report published by Data Bridge Market Research, the Next-Generation Antibody-Drug Conjugate (ADC) Therapies Market CAGR Value The global next-generation Antibody-Drug Conjugate (ADC) therapies market size was valued at USD 10.21 billion in 2025 and is expected to reach USD 30.80 billion by 2033, at a CAGR of...