


Golden Kingdom Week 1 Guide – Missions & Objectives
Golden Kingdom Week 1 Overview
A new chapter unfolds with the Golden Kingdom, and your first week is packed with pivotal objectives.
From securing key structures to confronting existential threats, your alliance's coordination will be tested.
Six core missions structure your progress, each unlocking on a set schedule throughout the week.
Every mission follows a dual-path design for advancement.
First, the entire warzone must collaborate to achieve a Reward Chest Goal, pooling efforts to fill a shared points meter.
Only upon reaching this collective milestone does the individual Mission Goal become active, guiding your specific strategic actions.
These objectives are deeply tied to the season's narrative, often running parallel to major seasonal events.
Prepare to engage with critical locations like the Protector’s Field and the Curse Research Lab.
Your efforts will involve harnessing the Blessing Fountain and coordinating through the Alliance Center.
Actions will range from strategic Purges and intense Digging Stronghold clashes to facing a looming Sandworm Crisis.
The week culminates in the large-scale City Clash and the pursuit of the powerful Marshall Exclusive Weapon.
Success hinges on unified strategy and timely execution across all fronts of the desert.
The mission launches immediately on Week 1, Day 1.
Both the objectives and the reward chest are accessible right away.
Contributing to the donation bar lets you erect the Protector’s Field outside your base wall.
That donation meter commonly fills up during the first day.
The Protector’s Field functions as the training ground for the season’s new unit, the Desert Protectors.
These Desert Protectors are the special seasonal soldiers drilled at that site.
Delve deeper into the desert protectors' lore and mechanics within their dedicated section.
'For comprehensive data on levels and attributes, please refer to the official spreadsheet via this link.'
'Additional strategic tools and resources for navigating Season 3 are available on our community hub page.'
Once the guardian's barrier is restored, fresh functionalities will become accessible within its domain.
Enhanced defensive mechanisms and strategic upgrades will be introduced, revitalizing the protected zone.
Players can expect new interactive elements and tactical options to emerge from the reconstruction efforts.
These additions aim to deepen gameplay and provide novel approaches to area control and resource management.
All fronts must combine their supplies.
A shared contribution totaling one million iron is needed.
Reaching that aggregate will trigger the main objective.
Coordinate donations across zones to meet the target.
Your personal contributions shape the leaderboard, determining your individual rank and its accompanying rewards.
Mission objectives and rewards are accessible from the very first day of the season.
Upon completing the donation requirement, you can construct the Curse Research Lab.
Check the Curse Research Lab section for full details.
Donations from all warzones are pooled; a collective total of 1,000,000 food must be contributed to unlock the primary objective.
Your personal contribution ranking will determine the rewards you receive, based on the total you donate.
Fill the donation meter to enable building the Blessing Fountains.
The mission becomes active on Day 1 of Week 1.
Objectives and the reward chest are available right away.
All warzones must pool their contributions until the combined total reaches 1,000,000 coins to unlock the primary objective.
For a full explanation of how Blessing Fountains work and what they grant, see the Blessing Fountains section.
Players are placed on a personal leaderboard according to how much they donate.
An individual donation ranking is generated from each player's contribution total.
Rank tiers correspond to specific rewards, awarded based on your position.
Contribute more to climb the list and earn progressively better prizes.
The mission becomes available on Day 2 of Week 1.
A shared donation meter must reach full before the Alliance Center can be constructed.
To start construction: open the Alliance menu, choose Alliance Center, then tap its coordinates to mark it on the map.
Once marked, dispatch a squad to the site to perform the repair/construction—this works like repairing the Alliance Furnace from Season 2.
Repair must be initiated by an officer with R4 or R5 privileges.
After construction, the Alliance Center grants buffs to alliance members who are inside its territory.
All warzones contribute toward a single target: a combined total of 1,000,000 coins is required to unlock the main objective.
Each player's contributions are ranked uniquely, offering exclusive rewards based on their personal donation totals.
'
A special leaderboard tracks every individual's support, granting distinct prizes that reflect their level of commitment.
'
Rewards are tailored to each participant, determined by where they stand in the donation rankings.
This mission activates on the third day of the initial week.
The objective to acquire reward chests is accessible immediately,
while the primary mission goal is set to commence after a 12-hour delay.
The core objective is the capture of Level 1 cities,
synchronized with the seasonal 'City Clash S3' event.
Its start time is aligned with the daily reset, plus a 12-hour offset.
For a complete overview of the city capture timeline,
refer to the dedicated 'City Clash S3' schedule.
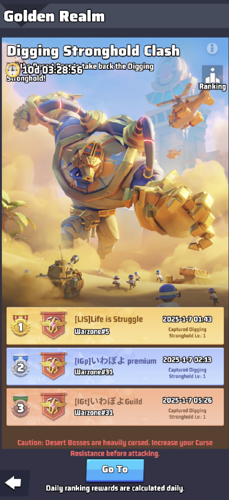
All active warzones must collaborate to secure a total of 10 digging strongholds collectively.
City Capture and Rewards
Primary objective: capture Level 2 cities — this task becomes available 12 hours after the daily reset (reset + 12h).
The operation officially begins on Day 6 of Week 1.
Reward chests are attainable immediately at the mission's start, while the main mission goal is subject to the 12-hour delay.
All warzones must cooperate to destroy a combined total of 100,000 enemy units coming from other zones.
For the complete Season 3 city capture timetable, consult the City Clash S3 schedule.
The battle pass granting Marshall’s exclusive weapon will be offered for purchase during a limited seven-day window.
Marshall’s new signature weapon becomes available starting on Day 4 of Week 1.
Plan ahead—you’ll have only that one-week period to obtain it.
To wield Marshall's exclusive weapon, achieving a 5-star tier for Marshall is essential, though you may acquire the battle pass beforehand.
Any items from the pass will be securely held in your inventory until ready for use.
Securing the battle pass early is advisable for future plans, as it offers cost savings compared to later individual purchases.
Activation requires specific components:
Upon activation, the weapon can be further enhanced using specific items.
Marshall's exclusive weapon elevates his combat capabilities substantially, with upgrades reaching level 30 at significant resource cost.
It provides major boosts to HP, attack, and defense, alongside all-damage resistance.
A key feature raises his skill maximum to level 40.
The associated battle pass mission begins on the first day of Week 1 and runs for a total of seven days.
Once the event begins, the moment a commander first defeats the highest-level zombie of the new season is logged for ranking purposes.
Rank placement is based first on the level of the zombie defeated — higher-level kills earn higher positions.
When commanders defeat zombies of equal level, earlier completion time serves as the tiebreaker.
Rankings are settled daily throughout the event, and rewards tied to each position are sent to commanders via in-game mail.
Higher ranks receive better prizes.
When Week Two begins and the Desert Treasure event goes live,\nactivate the Alliance Compass to reveal the Alliance Vault.
This assignment launches on the initial day of the first week, spanning a total duration of thirteen days.
Upon the commencement of the event, the duration each alliance requires to secure excavation fortresses is logged and assessed for ranking.
Alliances that successfully capture higher-tier fortresses achieve superior standings.
If multiple alliances secure fortresses of identical levels, precedence is granted to those accomplishing the capture in the shortest time.
Daily settlements occur throughout the event period.
Compensation is determined by an alliance's rank at each settlement, with elevated positions yielding more valuable rewards.
These ranking-based rewards are distributed directly via in-game mail.
This task begins on the initial day of the first week and spans a total duration of thirteen days.
For comprehensive details, please consult the segment dedicated to the Sandworm Crisis.
Start: Week 1, Day 3
Duration: 48 days total
Consult the Build an Oasis section for full details and guidance.
The third season commences on the server's third day at noon.
This event initiates the capture of cities inside your assigned warzone.
Its duration is designed to persist until every city tier becomes available.
Whenever a new level is set to open, its countdown will be displayed on this event interface.
Territory that touches a city (diagonal contact counts) enables that city to be declared upon by R5/R4 alliance officers.
Only R5 or R4 members may issue war declarations; once declared, the city becomes capturable.
An alliance may only designate one city as its active target at any given time.
If your alliance has neither digging strongholds nor cities, you must seize a Level 1 digging stronghold before attacking cities.
Capturing adjacent/connected territories opens the path for additional city declarations along that connection.
Siege engagements are influenced by curses — afflicted troops suffer penalties during sieges; raise your units’ curse resistance to lessen these effects.
Siege combat carries inherent risk: a percentage of forces may be lost outright during an assault; exact casualty ratios are listed on each city’s information panel.
Participants who capture a city for the first time receive one-time capture rewards.
All alliance members receive ongoing city rewards after a successful capture, and the alliance obtains loot chests to be distributed by R5 or R4 officers.
Following a successful conquest, every member of the capturing alliance gains alliance-wide buffs from the city.
A recently captured city enters a protection state during which it cannot be declared upon by others; captures by another alliance also trigger a protection period of approximately 6 days.
Abandoning a city does not restart that protection timer.
If your alliance previously abandoned a city, attempting to declare war on that same city is subject to a cooldown of about 5 days.
City level unlock schedule (all times include an extra 12 hours):
Level 1 unlocks Week 1, Day 3 + 12 hours
Level 2 unlocks Week 1, Day 6 + 12 hours
Level 3 unlocks Week 2, Day 3 + 12 hours
Level 4 unlocks Week 2, Day 6 + 12 hours
Level 5 unlocks Week 3, Day 3 + 12 hours
Level 6 unlocks Week 3, Day 6 + 12 hours
Level 7 unlocks Week 4, Day 7 + 12 hours
What are Last war: Survival and Last War: Survival Hot Package?
Last War: Survival Hot Package is a premium in-game resource used by players to acquire exclusive heroes, advanced equipment, and vital speed-up items to fortify their base against the undead hordes. Securing this currency through a top-up can be done on popular game trading platforms like MMOGA, G2G, and PlayerAuctions, where competitive rates are often available. Utilizing the Last War: Survival Hot Package effectively allows commanders to accelerate their army's development and gain a strategic edge in the global struggle for survival. This investment is crucial for those aiming to lead their faction to victory in the relentless battle for humanity's future.
Why Choose LootBar.gg to top up Last War: Survival?
If players are looking to top up Last War: Survival Hot Package, they may want to consider the lootbar game trading platform, lootbargg, as a premier destination. This platform stands out by providing a secure and versatile last war store, where transactions are not only safe but also tailored to meet diverse player needs. With a focus on user convenience, the site ensures that every recharge is straightforward, backed by round-the-clock support and a variety of payment options, making it effortless to acquire in-game resources.
Moreover, the advantages of using lootbargg extend beyond mere convenience, offering significant cost savings and community engagement. Players can benefit from competitive pricing, including exclusive discounts that make topping up more affordable, alongside access to a vibrant community hub for tips and events. This combination of economic value and a supportive network enhances the overall gaming experience, allowing enthusiasts to maximize their enjoyment in Last War: Survival without compromising on quality or security.
How to top up Last war: Survival at Lootbar.gg?
To complete a last war top up on the Lootbar trading platform, start by logging into your LootBar account or creating a new one if you are not yet registered.
- Navigate through the menu by selecting Home, then Top-up, and choose LW: Survival from the list of games.
- Browse the available Hot Package options for Last War: Survival and pick the one that suits your needs, then press the "Top-up now" button to proceed.
- Next, select your preferred payment method from the options provided and click on the "Pay Now" button to finalize your purchase.
- Once your payment is successful, submit your game account details and password so that LootBar can process and deliver the in-game currency to your Last War: Survival account efficiently.
What is the best Gaming Top-Up Platform?
As a trusted choice for gaming top-up, LootBar offers both top speed and affordability. The platform has earned a reputation as the best platform for gaming recharge, supported by outstanding customer feedback—4.9/5.0 on Trustpilot.
Категории
Больше
Hair fall, thinning strands, weak roots, and slow regrowth are common concerns today due to stress, pollution, hormonal imbalance, and poor nutrition. Many people now prefer a natural hair growth supplement that works internally instead of relying only on temporary external treatments. HairFortin is designed as a herbal hair support formula that helps nourish hair follicles from within,...

Sunset in Jerusalem is not merely a daily event; it is a profound transformation that touches history, faith, architecture, and emotion all at once. As the sun lowers behind the hills of Judea, the city enters a liminal moment where centuries seem to overlap. Stone walls glow with warm hues, prayers echo through ancient streets, and the sky becomes a canvas of gold, rose, and violet. This daily...

The spirit of witchcraft continues to weave its magic this season. As new events emerge on the horizon, a special blessing now graces the realm. From February 18th through the 25th, Mother's Blessing bestows an extra reward. Each time you return your Grim Favors, a Gift of the Tree Cache shall also be yours. Arise, adventurers, and prepare to claim your bountiful rewards. Mother’s...

In today’s highly competitive retail landscape, Custom Easter Boxes have become a powerful tool for businesses aiming to increase seasonal sales and strengthen brand identity. Whether you are presenting easter eggs, designing elegant easter beauty box collections, or promoting festive easter sweet boxes, packaging plays a vital role in customer attraction. Businesses across London,...

"Executive Summary Brain Monitoring Devices Market Trends: Share, Size, and Future Forecast CAGR Value The global brain monitoring devices market size was valued at USD 7.17 billion in 2024 and is expected to reach USD 12.98 billion by 2032, at a CAGR of 7.7% during the forecast period Being an excellent market research report, Brain Monitoring...