HDMI Not Working on TV? Here’s a Complete Guide to Fix It Fast
HDMI is the backbone of modern home entertainment. Whether you're connecting a gaming console, streaming device, laptop, or Blu-ray player, HDMI ensures high-quality audio and video through a single cable. But when HDMI stops working on your TV, it can instantly disrupt your viewing experience.
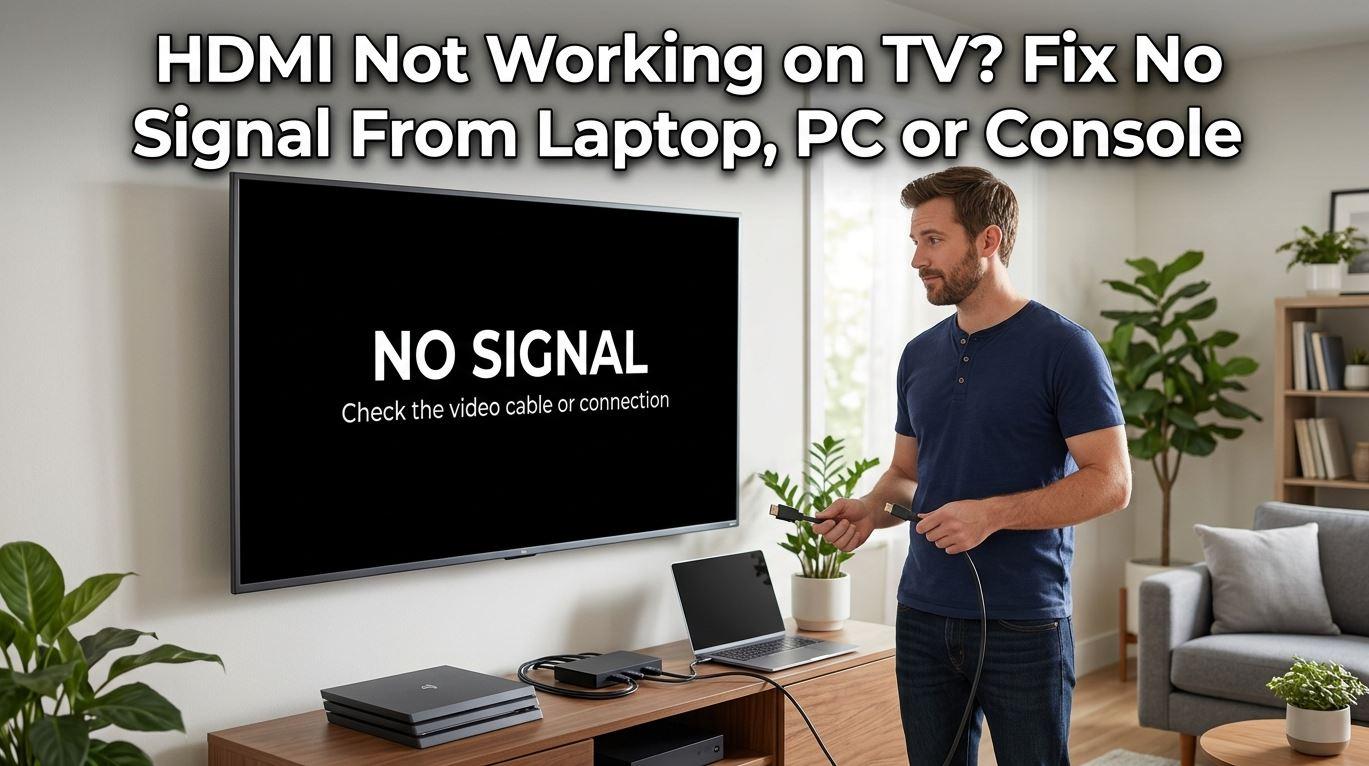
If you're dealing with a “No Signal” message, flickering screen, or no sound, don’t worry—this issue is more common than you think. In this guide, you’ll learn the real causes behind HDMI problems and practical, step-by-step solutions to fix them quickly.
Why HDMI Stops Working on Your TV
Before jumping into fixes, it’s important to understand what might be causing the issue. HDMI problems usually fall into a few key categories:
- Faulty HDMI cable
- Loose or damaged ports
- Incorrect input source
- Software glitches in TV or connected device
- Resolution mismatch
- Hardware failure
Identifying the root cause helps you avoid wasting time on unnecessary fixes.
1. Check the HDMI Cable First
A damaged or low-quality HDMI cable is one of the most common reasons for connection issues.
Start by unplugging the cable from both the TV and the external device. Inspect it for visible damage like bends, cuts, or loose connectors. Then:
- Try reconnecting it firmly
- Use a different HDMI cable
- Test the cable on another device
If switching cables solves the issue, your original cable was the problem.
2. Select the Correct HDMI Input
Sometimes the issue isn’t technical at all—it’s just the wrong input source.
Modern TVs have multiple HDMI ports (HDMI 1, HDMI 2, etc.). If your device is plugged into HDMI 2 but your TV is set to HDMI 1, you’ll see a “No Signal” message.
Use your remote control to:
- Press the Input/Source button
- Cycle through HDMI options
- Select the correct port
This simple step often fixes the problem instantly.
3. Restart Your TV and Connected Devices
Temporary glitches can interrupt HDMI communication. A quick restart can reset the connection.
Follow these steps:
- Turn off your TV and unplug it from power
- Turn off the connected device (console, laptop, etc.)
- Wait for 2–3 minutes
- Plug everything back in and turn on
This process clears minor software bugs and refreshes the HDMI handshake.
4. Inspect HDMI Ports for Damage
If cables are fine, the issue might be with the HDMI ports.
Look closely at both the TV and device ports:
- Check for dust or debris
- Look for bent or broken pins
- Ensure the cable fits snugly
You can gently clean the port using compressed air. If the port feels loose or damaged, it may require professional repair.
5. Try a Different HDMI Port
Your TV may have multiple HDMI inputs, and one of them might be faulty.
Simply:
- Plug your device into another HDMI port
- Switch to the corresponding input
If the new port works, your original HDMI port is likely defective.
6. Adjust Display Resolution Settings
Sometimes your external device is set to a resolution your TV doesn’t support.
For example, if your device outputs 4K resolution but your TV supports only 1080p, you might see no signal.
To fix this:
- Connect the device to another screen (if possible)
- Lower the resolution (e.g., 1080p or 720p)
- Reconnect to your TV
This ensures compatibility between devices.
7. Update TV Software
Outdated firmware can cause HDMI compatibility issues.
To check for updates:
- Go to your TV’s Settings menu
- Look for Software Update or System Update
- Install any available updates
Manufacturers often release updates to fix bugs and improve HDMI performance.
8. Disable HDMI-CEC (If Causing Conflict)
HDMI-CEC allows devices to control each other, but it can sometimes create conflicts.
If you're experiencing random disconnections or input switching:
- Go to TV settings
- Find HDMI-CEC (may be labeled differently like Anynet+, Bravia Sync, etc.)
- Turn it off
Test if the HDMI connection becomes stable afterward.
9. Test with Another Device
To narrow down the issue, try connecting a different device to your TV using the same HDMI port and cable.
- If the new device works → original device is the problem
- If it doesn’t → issue is with TV or cable
This step helps you quickly identify where the fault lies.
10. Perform a Factory Reset (Last Resort)
If nothing works, a factory reset may fix deep software issues.
⚠️ Warning: This will erase all your settings.
Steps:
- Go to Settings > System > Reset
- Select Factory Reset
- Confirm and wait for the TV to restart
After resetting, reconnect your HDMI device and test again.
When to Seek Professional Help
If you’ve tried all the above fixes and HDMI still isn’t working, the problem may be hardware-related. Common cases include:
- Burned HDMI port
- Internal circuit damage
- Motherboard issues
In such cases, it’s best to contact a certified technician or your TV’s support center.
Explore more expert tech guides, troubleshooting tips, and smart solutions at TechNexa Hub—your trusted source for fixing TVs, smartphones, laptops, and more. Stay updated with simple, practical advice that actually works.
Final Thoughts
HDMI issues can be frustrating, but in most cases, they’re easy to fix without professional help. From checking cables and ports to updating software and adjusting settings, a systematic approach can quickly restore your connection.
Instead of assuming the worst, start with simple troubleshooting steps—you’ll often find the solution faster than expected.
Categorias
Leia Mais
If you’re considering a long-term solution for unwanted hair, Laser Hair Removal in Riyadh is becoming increasingly popular. This advanced procedure uses concentrated light to target hair follicles, reducing hair growth significantly. Many residents choose this method for its efficiency, precision, and ability to treat multiple areas in a single session. Exploring Laser Face Hair...

School Network Bypass Strategies Bypassing School Computer Game Restrictions: A Comprehensive Guide School networks typically implement strict access controls to prevent students from playing games during educational hours. However, for those seeking entertainment during breaks or after school, there are legitimate methods to access gaming content on school devices. Using Virtual Private...
Kalau anda baru nak berjinak dengan dunia 4D online, sebenarnya tak susah pun. Ramai orang ingat prosesnya rumit, tapi hakikatnya sangat mudah dan mesra pengguna. Dengan perkembangan teknologi sekarang, hampir semua orang boleh beli no 4D hanya menggunakan telefon. Tak kira anda nak beli Toto, beli Magnum, atau cuba beli Damacai, semuanya boleh dilakukan dalam satu platform tanpa perlu keluar...

In the ever-evolving world of Steal a Brainrot, certain characters rise above the rest—and Foltyn is undoubtedly one of them. Known for his dynamic abilities and adaptability, Foltyn has become a favorite among players looking to gain a competitive advantage. One of the main reasons Foltyn is so popular is his flexibility. He can handle multiple roles effectively, whether it’s...
When it comes to enhancing the beauty and comfort of your home, few upgrades make as big an impact as a fresh coat of paint. If you're searching for reliable interior painters in Brownsburg, IN, choosing experienced professionals can ensure flawless results that last for years. Whether you're updating a single room or repainting your entire home, expert painters bring precision,...