


Complete Guide to Nail Art Brushes: Types, Uses & Pro Tips for Nail Technicians
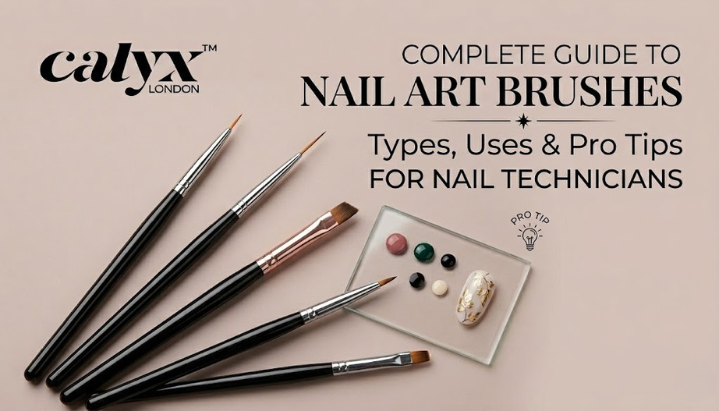
TL;DR This guide covers every essential nail art brush type, what it does, how to use it correctly, and how to care for it. If you are a nail technician or nail artist looking to level up your kit and your technique, this is the reference you need.
5 Key Points
-
Written for nail technicians and professional nail artists - this guide goes beyond the basics to cover brush types, techniques, and care at a salon-professional level.
-
The right nail art brush is not just a tool - it determines the precision, speed, and finish of every design you execute for a client.
-
Each brush type serves a distinct purpose: liners for clean strokes, detail brushes for intricate work, flat brushes for coverage, fan brushes for texture, and angled brushes for French tips and sharp edges.
-
Brush material matters - Kolinsky sable is the gold standard for acrylic systems, while synthetic bristles perform better with gel nail paint and avoid UV-curing damage.
-
Cleaning protocols differ for gel and acrylic brushes - using the wrong product (such as acetone on gel brushes) can permanently damage bristles and compromise your results.
As a nail technician, you already know that skill alone does not produce perfect results. Your tools matter just as much. And among all the tools in your kit, nail art brushes are the ones that separate a confident, precise artist from someone who is still guessing.
The problem is that most guides on nail art brushes are written for hobbyists. They cover the basics, list a few brush names, and move on. What nail professionals actually need is a clear, technical breakdown of every brush type, what it is built for, how to handle it correctly with different products, and how to maintain it so it performs consistently across every service.
This guide delivers exactly that. Whether you are building your first professional nail art brush kit or refining an existing one, here is everything you need to know.
Why the Right Nail Art Brush Changes Everything
The difference between a clean, hair-thin line and a wobbly one often comes down to the brush in your hand, not the hand itself. Every nail art brush is engineered for a specific type of movement, product viscosity, and design outcome.
Using the wrong brush for a technique forces you to compensate with pressure or speed adjustments that compromise control. It also slows you down, which in a busy salon environment is a real cost.
Nail art brushes also interact differently with product types. A brush that performs beautifully with acrylic paint may drag or split when used with gel nail paint. Understanding these distinctions is what allows professional nail technicians to work efficiently and deliver consistent results.
Understanding Brush Materials: Kolinsky vs. Synthetic
Before diving into brush types, it is worth understanding what your brushes are made from, because material determines performance and dictates how you clean and store them.
Kolinsky Sable is considered the gold standard in professional nail artistry. These natural hair bristles have a fine, tapered point, excellent snap-back, and superior product pickup. They are the preferred choice for acrylic application and detailed art work using acrylic paints. Kolinsky brushes require cleaning with monomer - never acetone, which strips the natural oils and causes bristles to fray and lose shape.
Synthetic Bristles are better suited to gel nail paint applications. They are durable, easy to clean with isopropyl alcohol, and critically, they do not absorb moisture in a way that causes product contamination. They are also a more accessible option for building out a comprehensive nail art brush kit without significant cost.
Knowing your brush material tells you exactly how to clean it, how to store it, and what products it will perform best with.
The Essential Nail Art Brush Types Every Technician Should Know
1. Liner Brush (Striping Brush)
The liner brush is one of the most used tools in a professional nail art brush kit. It has long, fine bristles that come to a precise point, making it ideal for creating clean, continuous lines in a single stroke.
Liner brushes come in short, medium, and long variants. Short liners give you more control for intricate work and geometric patterns. Long liners (sometimes called striping brushes) are designed for sweeping strokes - think pinstripes, swirls, and extended floral stems. The longer the bristles, the more gel nail paint or pigment they hold, which means fewer reloads mid-stroke.
Professional technique tip: Load the brush evenly, anchor your hand on the work surface, and pull the stroke in one fluid motion. Avoid pressing down - the tip should barely graze the nail. Rotate the bristles back into shape after each wipe to maintain the point.
2. Detail Brush (Micro Detail Brush)
If liner brushes are for sweeping work, the detail brush is for precision. Short bristles with an ultra-fine tip make it the go-to for tiny florals, lettering, dot-work, and any design where millimetre-level accuracy is required.
Detail brushes work best with gel nail paint that has a slightly thicker consistency. Thin, runny products can bleed outside the intended area before you get the chance to correct it. Always work with a small amount of product on the tip and build up gradually.
This brush is particularly valuable for 3D nail art, encapsulated designs, and for adding fine detail over a cured gel base.
Professional technique tip: Clean the brush immediately after each colour change. Pigment from gel nail paint can bleed into your next colour if left on the bristles even briefly.
3. Flat Brush
The flat brush has a wide, straight edge and is designed for coverage. It is the right choice when you need to fill large areas of the nail efficiently or create bold, graphic shapes with clean edges.
In a professional context, flat brushes are also used for one-stroke techniques where two colours are loaded onto the brush simultaneously to create gradient petals or blended shapes in a single movement. They are widely used in gel nail paint nail art where smooth, even product distribution matters.
The flat brush is also useful for applying gel builder products, blending gel colours, and certain marbling techniques where a broader tool is needed to move product across the nail.
Professional technique tip: When working with gel nail paint, avoid overloading the flat brush. Excess product creates bulk and uneven surfaces that become difficult to correct once cured.
4. Angled Brush (Angular Brush)
The angled brush has bristles cut at a diagonal, and this shape makes it one of the most versatile tools in the nail art brush kit. The tip handles fine lines and edge work, while the flat edge executes broader strokes, making it practical across multiple design styles.
For nail technicians, the angled brush is a staple for French tip applications. The slanted edge follows the smile line naturally and gives clean, sharp results without needing to tape or mask the nail. It is also used for creating colour transitions, geometric nail art, and clean-up around the cuticle area.
Professional technique tip: Hold the brush at a 45-degree angle to the nail surface for maximum control. When applying gel nail paint along the free edge, use the corner of the brush rather than the full width for the sharpest finish.
5. Fan Brush
The fan brush is the most visually distinctive brush in a nail art kit, and it has a specific set of uses that no other brush replicates. The splayed bristles are designed for texture work - applying glitter, loose pigment, or flakies over the nail in a soft, diffused manner.
Fan brushes are also used for blending gradient effects, removing excess powder without disturbing the design, and creating feather-like, abstract textures. They are not a detail brush or a coverage brush; they are a finishing and effect brush.
Professional technique tip: Load the fan brush lightly. Too much product causes clumping and a heavy, uneven finish. For glitter or chrome effects over gel nail paint, tap the brush gently rather than sweeping to control dispersion.
6. Round Brush
The round brush has a full, rounded tip that tapers to a point. It is primarily used for gel nail paint art that requires both coverage and precision - filling in larger design elements like petals or abstract shapes while still maintaining control around the edges.
Round brushes are also a reliable choice for ombre work when used with a stippling or dabbing motion. In acrylic nail artistry, a round Kolinsky brush is the traditional tool for bead placement and sculpting.
Professional technique tip: The round brush gives you flexibility in line weight. Light pressure produces a fine line at the tip; increasing pressure fans the bristles slightly for a broader stroke. Mastering this pressure control is what makes the round brush so versatile.
7. Ombre / Blending Brush
For gradient and ombre nail art, a dedicated blending brush is far more effective than improvising with a flat or fan brush. These brushes typically have a slightly fuller, softer bristle head designed to blend two colours seamlessly at the point of transition.
They are particularly effective when working with gel nail paint, where the product remains movable until cured. The blending brush allows the technician to work gel colours into each other without harsh lines forming.
Professional technique tip: Work quickly and use small, feathering strokes at the colour transition point. With gel nail paint, you have time to refine - but do not over-work the product or it will begin to pill and lose its smooth finish.
8. Cleanup Brush (Correction Brush)
No professional nail art kit is complete without a cleanup brush. This thin, precise brush is used with gel nail cleanser or acetone to remove product from around the cuticle, tidy edges, and correct small errors in a design without disturbing the surrounding work.
In a salon environment, the cleanup brush is what gives finished nails that polished, professional appearance. It is often the difference between a result that looks hand-crafted and one that looks rushed.
Professional technique tip: Dip the brush sparingly - too much cleanser or acetone can flood surrounding gel nail paint and cause lifting or smearing. Use a wiping motion rather than a dragging one for the cleanest correction.
How to Build a Professional Nail Art Brush Kit
When assembling a nail art brush kit for professional use, the goal is coverage across technique types without over-investing in tools you will rarely reach for.
A well-rounded starting kit for a nail technician should include a short liner and a long liner for line work at different scales, a detail brush for precision, a flat brush for coverage and one-stroke techniques, an angled brush for French tips and edge work, and a cleanup brush as a non-negotiable finishing tool. From there, a fan brush for texture and glitter effects, and a dedicated ombre brush for gradient services, complete the core set.
As your design repertoire grows, you may add specialised tools - a 3D art brush for acrylic sculpture, a filbert brush for soft blending, or category-specific liner lengths for different stroke styles. The key is building purposefully rather than accumulating brushes you do not actually use.
Quality matters more than quantity. A handful of high-performance brushes will consistently outperform a large collection of poorly made tools.
How to Clean and Maintain Nail Art Brushes: The Professional Standard
Brush care is not optional in a professional setting. Dirty brushes deliver inconsistent results, risk product contamination across clients, and wear out faster - which is a recurring cost to your business.
For acrylic brushes: Monomer is your cleaning solution of choice. Wipe the brush on a lint-free cloth after each bead placement during the service. Never allow acrylic to set in the bristles. At the end of a service, wipe thoroughly with a monomer, reshape the bristles, and store the brush flat or with the tip protected by a cap. Avoid acetone for routine cleaning - it strips the natural oils from Kolinsky sable and causes irreversible bristle damage.
For gel nail paint brushes: Isopropyl alcohol at 70% or above is effective for cleaning synthetic bristles. A thorough wipe on a lint-free cloth during and after the service is usually sufficient. Never allow gel residue to cure on the brush - keep it away from your UV/LED lamp at all times. A brush exposed to curing light is permanently unusable.
A lesser-known professional tip: clearing gel nail paint from a brush using a small amount of clear gel on a palette works extremely well. Running the brush through the clear gel pulls the pigment out without any need for solvents that might compromise the bristle integrity over time.
After cleaning any brush, reshape the bristles with your fingers and store them capped, flat, or in a brush holder with the tips facing upward. Avoid storing brushes loosely in a case where bristles can bend or splay under pressure.
Common Mistakes Professional Nail Technicians Should Avoid
Even experienced nail technicians can develop habits that shorten brush lifespan or compromise technique. The most common ones to watch for:
Using acetone to clean gel brushes is a frequent error that damages synthetic bristles over time and makes product application less smooth. Using monomers on gel brushes is equally problematic in the other direction.
Exposing gel nail paint brushes to UV or LED light - even briefly - cures the product on the bristles and renders the brush unusable. Keep a brush cap or a dark storage cloth nearby during gel services.
Over-loading brushes with products is a technique issue as much as a maintenance one. Excess gel nail paint on a liner brush, for example, causes flooding and loss of line definition. Load lightly, wipe the excess, and reload as needed.
Neglecting to reshape bristles after cleaning is what causes brushes to lose their form over time. It takes ten seconds and significantly extends the functional life of each brush.
Conclusion
A professional nail art brush kit is one of the most important investments a nail technician or nail artist makes. These tools are what translate creative vision into precise, repeatable results for every client.
Understanding the function of each brush type, how it interacts with gel nail paint and acrylic systems, and how to maintain it correctly is the foundation of consistent, high-quality nail artistry. The technicians who produce standout work are rarely just more talented - they are better equipped and more disciplined with their tools.
Key takeaways from this guide:
-
Choose brush material based on your product system: Kolinsky for acrylic, synthetic for gel nail paint
-
Build your nail art brush kit around core technique types before expanding to specialist tools
-
Each brush type has a defined role: do not substitute when the right tool exists
-
Clean gel and acrylic brushes differently and always clean immediately after use
-
Reshape and store brushes properly after every service to protect your investment
At Calyx London, we design professional nail products for technicians who take their craft seriously. Explore our nail education resources through the Calyx London Nail Academy and discover professional-grade tools and gel nail paint collections built to support expert artistry.
Discover every essential nail art brush type, how to use them correctly, and professional cleaning tips for gel and acrylic nail systems.
Catégories
Lire la suite
SEM Trends That Will Dominate 2026 Search Engine Marketing is evolving rapidly, and businesses that adapt early are gaining a major competitive advantage. In 2026, SEM is no longer limited to running paid ads; it now combines AI automation, user intent analysis, personalization, and data-driven optimization to deliver better performance across digital platforms. As competition grows online,...

NEWARK, Del., July 8, 2026 — The global Moringa Products Market is witnessing robust expansion as consumers increasingly embrace plant-based nutrition, functional foods, and natural health supplements. According to Future Market Insights (FMI), the market is projected to grow from USD 10.2 billion in 2026 to USD 25.5 billion by 2036, registering a 9.6% CAGR during the forecast period....

Market Overview Polaris Market Research’s latest research report, titled U.S. Private 5G Network Market, offers a comprehensive and data-driven analysis of the market landscape. Designed for decision-makers, strategists, and industry participants, this in-depth study offers critical insights into current trends, market dynamics, competitive strategies, and growth projections. In a market...
With Halloween just around the corner, it's the perfect time to indulge in some spine-chilling entertainment. Netflix has curated an impressive collection of horror films guaranteed to keep you awake long after the credits roll. The streaming giant's horror selection spans across continents, featuring everything from psychological thrillers to supernatural encounters, gory slashers to subtle,...

Getting locked out of your home can happen to anyone. It may occur because you misplaced your keys, left them inside the house, or experienced a broken lock. Whatever the reason, staying calm is the first step toward solving the problem safely. If you are facing this situation, contacting an Emergency Locksmith service NJ can help you regain access to your home quickly while minimizing the risk...
