Simple Steps to Install Your Harbor Breeze Ceiling Fan with Ease

Installing a ceiling fan is one of the easiest ways to upgrade your home’s comfort and style. Whether you’re adding better air circulation, improving lighting, or enhancing your décor, a ceiling fan can make a big difference. Thankfully, Harbor Breeze ceiling fans are built with simplicity in mind, making them ideal for homeowners who enjoy do-it-yourself projects. With clear instructions and smart design, anyone can install a Harbor Breeze fan quickly and confidently — no professional help required.
Here’s a complete guide to help you install your fan safely and effortlessly, along with the reasons why Harbor Breeze remains one of the most trusted names in home cooling.
Step 1: Prepare for Installation
Before you start, gather the necessary tools and materials. You’ll need a screwdriver, pliers, a ladder, wire connectors, a voltage tester, and electrical tape. Start by switching off the power from your circuit breaker to ensure safety. Once the power is off, unpack your Harbor Breeze fan and check that all parts are included. Preparing properly saves time and prevents mistakes during installation.
Step 2: Install the Mounting Bracket
The mounting bracket is what holds your fan securely to the ceiling, so installing it correctly is essential. Remove any old fixture or fan, then confirm that your ceiling’s electrical box is rated for ceiling fan installation. This ensures it can handle the fan’s weight and movement. Attach the Harbor Breeze mounting bracket to the box using the screws provided, making sure it’s firmly in place. A solid bracket means a stable, noise-free fan.
Step 3: Assemble the Fan
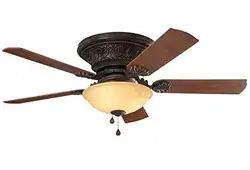
Assembling a Harbor Breeze fan is simple and straightforward. Begin by connecting the downrod to the motor housing if your model includes one. Then attach the fan blades. Many Harbor Breeze fans feature Quick Install blades, which snap easily into place without the need for multiple screws — a convenient feature that saves time and effort. Once assembled, you’ll be ready to handle the wiring.
Step 4: Connect the Wiring
Wiring is often the most intimidating step for homeowners, but Harbor Breeze makes it simple with color-coded wires and clear instructions. Match the fan’s wires with the ceiling wires:
-
Black (fan power) connects to black (ceiling hot)
-
White (neutral) connects to white (neutral)
-
Green or bare wire (ground) connects to the ceiling ground wire
If your model includes a remote control receiver, install it between the fan and ceiling wires as described in the user manual. Once all connections are made, secure them with wire connectors and wrap them with electrical tape for added safety.
Why Choose “Harbor Breeze”?
At this stage, it’s easy to understand why so many homeowners choose Harbor Breeze for their ceiling fans. The brand combines innovation, style, and user-friendly design — making installation and performance a breeze.
1. Effortless Installation:
Harbor Breeze fans are specifically designed for easy assembly. Features like Quick Connect blades, preassembled components, and detailed manuals make the process fast and hassle-free.
2. Energy Efficiency:
These fans are built to move air efficiently while conserving power. Many models are ENERGY STAR® certified, providing excellent airflow while keeping energy costs low.
3. Stylish and Versatile Designs:
From sleek modern looks to classic wood finishes, Harbor Breeze offers fans to complement any décor. Whether you’re decorating a cozy bedroom or a spacious living area, there’s a design to match your style.
4. Quiet, Durable Performance:
Each fan is equipped with a high-quality motor that operates quietly and reliably. Built from durable materials, Harbor Breeze fans are designed to last for years with minimal maintenance.
5. Affordable Quality:
Offering premium quality at a budget-friendly price, Harbor Breeze fans provide unbeatable value — combining style, performance, and affordability in one package.
Step 5: Secure and Attach Accessories
Once the wiring is finished, carefully lift the fan motor and secure it onto the mounting bracket. Tighten all screws to ensure it’s firmly attached. If your model includes a light kit, follow the instructions to connect it properly. Harbor Breeze light kits often feature integrated LED lighting, which is energy-efficient and long-lasting.
Before turning on the power, double-check that all components are securely fastened and that no wires are exposed.
Step 6: Test and Balance the Fan
Turn the power back on and test your fan. Check all speed settings and light functions. If the fan wobbles slightly, use the balancing kit provided with most Harbor Breeze models to make adjustments. A balanced fan will run quietly and efficiently.
Step 7: Maintain Your Fan for Long-Term Use
A little maintenance goes a long way in keeping your fan working perfectly. Dust the blades regularly to maintain smooth airflow, and check that all screws remain tight over time. With simple care, your Harbor Breeze fan will continue performing beautifully for years.
Final Thoughts
Installing a Harbor Breeze ceiling fan is a straightforward project that can completely transform your home’s comfort and appearance. Thanks to its user-friendly features, durable design, and stylish finishes, Harbor Breeze makes it easy for any homeowner to achieve a professional-quality installation.
Whether you’re upgrading your living room, bedroom, or patio, a Harbor Breeze fan offers the perfect blend of efficiency, beauty, and reliability. With just a few tools and this simple guide, you can install your fan quickly, safely, and confidently — enjoying cool comfort and elegant style every day.


